My passion for interior design derives from helping people just like you solve design dilemmas. My hope is that I can inspire you through my own life journey and what I’ve learned along the way. Thank you for your support. -Tiffani
3 Designer Tips to Easily Refresh Your Space
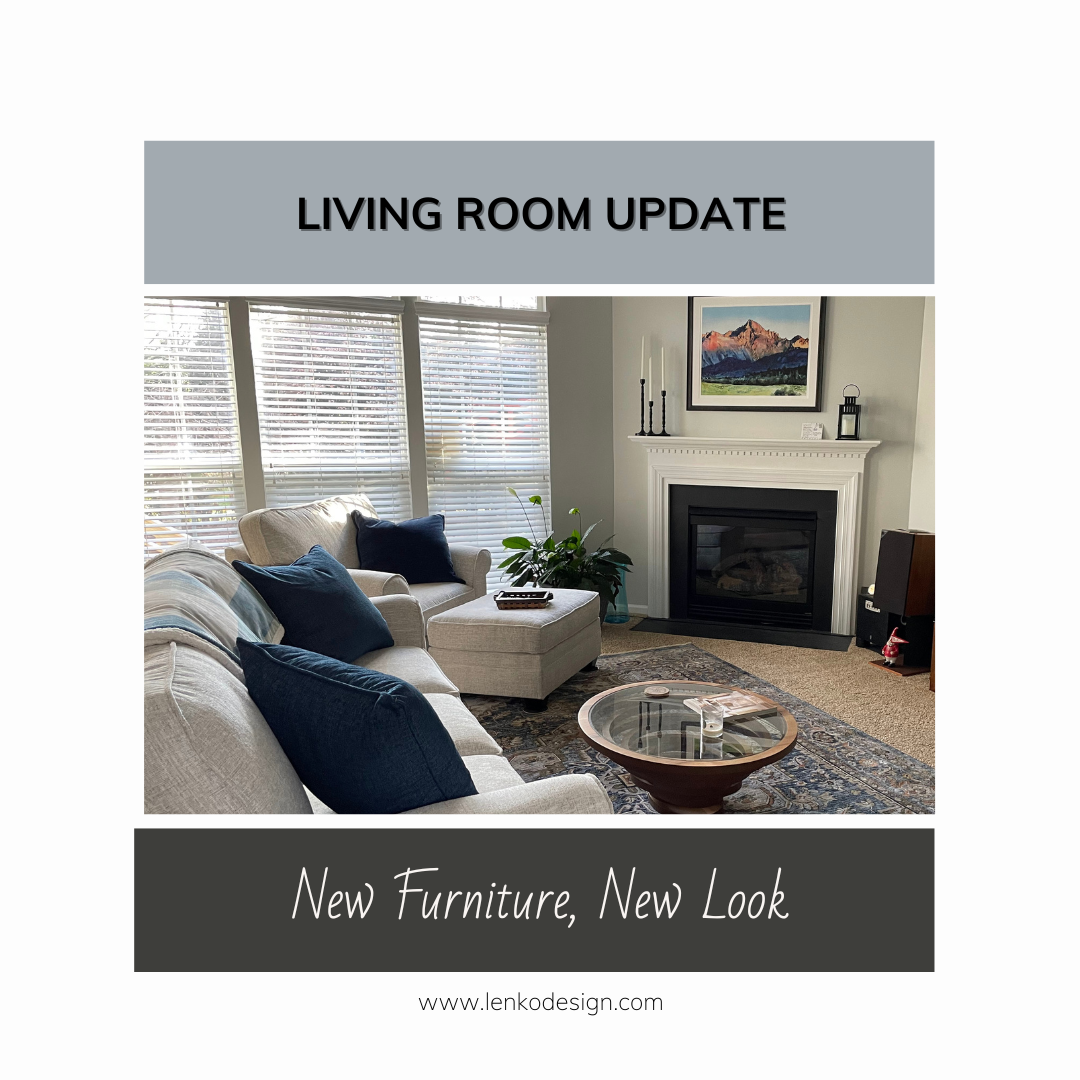
Swapping out throw pillows is one of the most inexpensive ways to spruce up your home decor.
Updating Throw Pillows is my top recommendation to quickly and affordably refresh your home! Swapping out a throw pillow cover is one of the easiest ways to change up the look of your space and give it a fresh new look!
When it comes to changing out your throw pillows in a Living Room, I recommend keeping the large pieces in your room (sofa, chairs, ottomans, etc.) neutral or even a solid so that the throw pillow updates are easy to change when the mood strikes and not to mention are super affordable! You could potentially update your rooms seasonally, yearly, or as often as you like by switching up the throw pillows. You could really spruce things up by adding a new area rug and a few statement accessories!
If you are bored with your bedroom decor, the same concept applies. If the headboard and base bedding are fairly neutral, you could switch up the pillows, duvet, and other accessories to completely change the look!
Let’s Talk Pillows
Tip #1:
Always… I mean always check to see if the pillow cover you are ordering comes with an insert or not. You will end up with a disappointing surprise when the package arrives at your doorstep to only find a small flat package instead of a larger box!
When selecting a pillow insert, a great rule of thumb is to size up by 2 inches. Doing so will allow your pillows to look fuller and clean instead of saggy or wrinkly. Plus you’ll be able to karate chop them to make those pointy dog ears!
Size up when it comes to ordering your duvet inserts too! Using a King duvet insert inside of a Queen duvet cover makes for a super overstuffed fluffy bed of dreams!
Tip #2:
Mix it up with patterns and textures!
The results will be more sophisticated and visually interesting. Incorporate the Interior Design Principles scale, color, and texture into your combinations.
An example would be to start with either a solid or a large scale pattern. Next, layer in a smaller scale geometric or floral pattern. Lastly, complete your look with a bold pattern, solid, or textured pillow. The possibilities are endless!
Tip #3:
The Art of a Polished Arrangement
Symmetrical pillow arrangements work well in more formal settings. A matchy-matchy pillow arrangement is sometimes necessary in order to create visual balance.
If your space is a bit less fussy, try out an asymmetrical pillow arrangement. You might be surprised by the outcome of a more interesting arrangement from varying the throw pillow sizes.
Incorporating fresh new throw pillows can instantly update your decor.
Are You Ready to Refresh Your Look?
Shop all the pillows shown right here…
Like these Pro Tips? Receive even more helpful information… never salesy stuff! Sign up for my Mailing List and never miss out.
What’s your favorite pillow combo? I’d love to hear from you!
5 Tips To Repurpose Everyday Decor into Festive Holiday Decorations
Creative ways to repurpose your existing holiday decor to create a gorgeous backdrop for all your family traditions.
Fall in Love with Your Holiday Home
The holidays are right around the corner, and I for one can’t wait to decorate my own home for the holidays. I love the nostalgic feeling I get when my decorated tree is lit and filled with ornaments from over the years. The stockings are hung from the mantle and everything feels so comforting.
Do you have boxes upon boxes of Christmas decorations that you are tired of sorting through? Does your holiday decor contrast with your home decor? Is spending money on new decorations not an option for you?
Let’s take a look at some examples of how day-to-day decor items that you may already have can be transformed into gorgeous Christmas decorations.
1. Baskets
Baskets are the one versatile item that I use on the regular. They can store cozy blankets, firewood, little Christmas trees, or even beautiful red Poinettas.
In the example below, you can see how simple it is to fill a basket with Christmas tree clippings, logs, and lights!
2. Jars
Whether or not you love to preserve or pickle, I’m sure you can pull out a few canning jars from tucked away in a cabinet. Most DIYers know that classic glass vessels are great for projects throughout every season. Using canning jars in your Christmas decor not only is versatile, but inexpensive. From kids snow globes to Christmas presents, these handy little glass jars offer so many possibilities.
3. Crates
Creating a hot cocoa station is super easy, just gather an old crate, containers you have on hand, and your best mugs! Cut greenery and cinnamon sticks have been tied to the mugs to add extra holiday pizazz along with the fresh scent of cinnamon. Fill your containers with hot cocoa mix, tiny marshmallows, and any other toppings for hot cocoa on those chilly days!
4. Cake Stands
Chances are you have at least one cake stand, maybe one handed down from a family member. Pull it out and use it as a table centerpiece! Simple white candles surrounded by a wreath or garland make for an elegant tablescape.
5. Apothecary Jars
Apothecary jars look great filled with classic red and white decorations. How easy is that? Clean out your apothecary jars from your bathroom and fill them with festive candy, bows, or even ornaments. Voila! Simple yet festive entryway decor.
I hope these ideas inspire your inner DIYer self and fill you with holiday cheer! Have fun repurposing what you already have. Your home will feel fresh and renewed.
I wish you and your family a very safe and happy holiday season.
Santa has Elves… You have ME!
Professional Holiday Decorating Services will help you create a gorgeous backdrop for all your family traditions.
Ready to redefine your existing holiday decor? Get started by scheduling a FREE 30-minute Zoom Discovery Call.
Home Remotely Staged in Orlando, FL
Owner-occupied home staged in Orlando, FL during a pandemic sells in 4 days for 3% ($15k) above asking price.
Staging A Home During A Pandemic
The real estate market has been HOT even though Stay at Home and Shelter in Place orders have been in effect for months across the nation. People are eager to upgrade their home and current living situations to better suit working from home and remote learning. Not to mention, interest rates are at an all-time low!
Why stage when houses are selling so quickly? The short answer is to get more money!! Statistically, staged homes sell on average for 9-30% more than unstaged homes according to the 2020 RESA Study of Staged Homes.
Pictured below, I recently staged this former model home located in Orlando, Florida that boasts tranquil views of a gorgeous golf course. The homeowners originally listed their home in 2019, however, it sat on the market for over six months with multiple price reductions and only a few low ball offers.
After much consideration of making necessary updates and working through my Home Staging Action Plan, this house now looks and feels like a million bucks! Since I am based in North Carolina, the homeowner’s and I were able to utilize technology to work through the Staging Action Plan and collaborate on what needed to get done.
The home was listed on a Saturday morning and had multiple showings that same afternoon. After five offers which lead to a bidding war, the home went under contract in 4 days! This beautiful home sold for 3% over asking price!! I couldn’t be happier for the seller or the new buyer. #homestagingworks
In my detailed Action Plan, we began with all of the homeowner’s furnishings. This home was a classic case of having too much furniture so what we needed to do first was eliminate outdated and unnecessary furniture and accessories. Every room felt overcrowded and cramped. The homeowner took my suggestion to store the unused furniture in a storage unit. They were also able to sell many items on Offer Up.
After the furniture was removed we were able to really see the potential in each room and focus on architectural features. The furniture was repositioned so it best suited each space and leads your eye to focus on the positive features.
Next, we worked on depersonalizing the home and edited each room.
Memorable moments or strategically placed vignettes were created so that buyers can emotionally connect with the home. Savvy home sellers realize that creating a “show home” environment will entice buyers. Going the extra mile and paying attention to every single detail will pay off in the end!
A few modern accessories were purchased to help update the rooms.
HOT TIP: Bright white duvet covers, euro sham pillows, accent throw pillows, textured blankets, artwork, and other neutral tabletop accents are an easy way to update and bring life to a room.
A key room to always stage is the Owner’s Main Bathroom shown below. In this particular house, replacing the vanity cabinets and mirror were not in the budget so we opted to have the cabinets and mirror trim refinished in Sherwin Williams Keystone Gray SW7504. We gave the bathroom a fresh new look by painting the walls Sherwin Williams Agreeable Gray SW7029. The vanity light fixture and cabinet hardware were updated with chrome fixtures complimenting the other fixed elements in the bathroom.
Only 1 out of 10 people can visualize furniture in a space. For this reason, it is critical to stage your home so that the vast majority of prospective buyers can visualize themselves living in the home. Investing in professional photography will make your listing stand out online.
Don’t leave money on the table by not consulting with a Professional Home Stager when selling your home.
Powder Room Makeover
Shabby Chic and Rustic design styles blended in this bathroom makeover.
Shabby Chic Meets Rustic
When we moved into our new home just north of Charlotte, North Carolina, I knew one of our renovation projects was going to be our powder room. This half bath was filled with boring builder-grade fixtures. The Designer in me just couldn’t handle all this blah…
In my home, you would find decor that has a mix of antiques passed down through our family, modern transitional furniture, a little bit of farmhouse, and a mix of rustic charm. I call it Shabby Chic meets Rustic!
Shabby Chic consists of feminine decor, while Rustic style often appears masculine. Both are casual styles with an antique look and feel, making it easy to blend the two.
My husband and I both agreed on using blue as an accent color throughout our home. We chose Sherwin Williams Granite Peak SW6250, which I color matched to one of our living room throw blankets. We used this paint color for an accent wall in our living room as well as the interior side of our front door. It’s gorgeous and works well with our Sherwin Williams Agreeable Gray SW7029 walls and mixed wood-tone LVT flooring.
Powder rooms are areas where you can go BOLD and make a statement. We decided on painting the walls the Granite Peak Blue and update the boring builder-grade fixtures.
Below are my 2D Vision Boards for our bathroom. I put this together as a way to visualize our bathroom fixtures before we committed to purchasing items. This also allowed me to explain my overall concept to my husband and make sure he was on board with my ideas.
The Plan
When I first started planning out this bathroom design I came across a farmhouse sink furniture style vanity with a beautiful marble top. The white cabinetry contrasts the dark blue walls and fills the awkward space much better than the original pedestal sink. The farmhouse sink set the stage for the overall concept of blending two styles together.
The widest wall in our bathroom to the right of the toilet needed something amazing to fill that space. We originally found reclaimed wood that we considered installing, but after researching the heck out of this process and calculating the costs, we felt that the wood accent wall would be too time-consuming and expensive for a space that is not a main living area in our home.
Plumbing
We coordinated the new Moen Halle faucet with the Moen Halle towel ring and toilet paper holder all in brushed nickel.
Light Fixtures
I chose two different styles of light fixtures to further blend Shabby Chic and Rustic together. The vanity light has a rustic Edison bulb mason jar feeling about it while the orb mini pendant light is elegant and feminine. Both fixtures are brushed nickel driving home the juxtaposition of the two different styles.
Accents
Mirror: The vanity mirror is elegant with curvy lines contrasting the straight lines of the farmhouse vanity. I could have kept the original oval mirror and it would have worked out fine, but I really wanted to have a showstopper mirror!
Artwork: The flower canvas painting was the very first item I purchased from the Going Out of Business sale at Pier 1. I liked the colors and knew that I wanted to use a shade of blue in the bathroom, so this painting really served as my inspiration piece.
Wall Shelf: The wall shelf has a natural-colored wood tone top with distressed white metal corbels. I thought this shelf worked well because it of its overall size, it adds a natural wood element to the room, and could be used in either a Shabby Chic or a Rustic setting.
Shutters: The two white primitive shutters were locally sourced at an antique mall. I instantly fell in love with them and knew they were the perfect solution for the widest wall in our awkwardly shaped powder room. I think the bright white chippy paint accentuates the vanity cabinet nicely. The straight lines found in the diamond shapes are interesting and contrast nicely against the curvy lines of the vanity mirror and orb pendant light.
So what do you think about Shabby Chic and Rustic design styles working together in this Powder Room?
Ready to get started with a room in your home?
Schedule a FREE 30-minute video chat with me!
Like our styling tips? Signup for your FREE design cheat sheet to set yourself up for Design Success!
5 Steps to Effectively Design Your Home Office
Designing a home office in a way you love is actually pretty powerful. When you enjoy the space, you want to keep it tidy. A clean, organized workspace will help you enjoy your work.
What if working from home goes on forever?
As daunting as that may sound, remote work is surprisingly productive — leading many employers to wonder if they’ll ever go back to the office.
If you have been working from home and will continue to do so for the foreseeable future, it may be worthwhile to update your home office and make it work for you. Working in an environment that brings joy and inspires you will help you stay on task and contributes to greater productivity.
Follow These Steps When Designing Your Home Office
Do you already know what your personal design style is? Great! You are ready to skip ahead and follow our recommended five steps.
If you aren’t sure what your personal design style is, take my fun home office design style quiz at the end of this post!
No matter what your personal design style is, here are five steps to consider that will help you achieve a functional and aesthetically pleasing workspace.
1. Stay Organized
Before you stockpile organizational bins and file cabinets, put some thought into how you actually organize. If you already scan your receipts and keeps things digitally, why buy a filing cabinet? You have the flexibility of creating your workspace the way you need it. Do it in a way that will work for you long term.
2. Elevate Your Thinking
Even the smallest home office can be fully stocked with great decor and organizational solutions. The trick is to think up. Maximize your vertical square footage by adding floating shelves or installing wall cabinets. Fill them with useful bins alongside colorful books or meaningful artwork.
3. Let There Be Light
Sufficient lighting makes work easier. We strain our eyes staring at screens most of the day. Don't make it worse by limiting lighting in your home office. Use natural lighting as much as possible, but make sure to supplement where it falls short.
A well-lit office is a happy, productive one.
4. Cut The Cord Clutter
One of the worst things about offices is all the tech clutter that accumulates. You probably need your computer and printer, but that doesn't mean you have to stare at cord tangles all day. Take steps to free your home of cord clutter. Mount a power strip underneath or on the back of your desk. Use cable ties and command hooks to wrangle any cords that get plugged into that power strip and feed them along the back of furniture out of sight. You'll be amazed at how removing that eyesore of cords will make your office feel clean and bright.
5. Make Yourself At Home
Your office is an extension of your home. It should look and feel like one. Decorate with the same themes you've used in your house and incorporate items you love. Don't limit yourself just because this is a workspace. You'll be more productive in a room that brings joy, so why not put some extra care into creating an office that feels like home?
What is Your Home Office Design Style?
Find out now by taking this fun quiz.
Looking for some professional design advice for your home office? Schedule your FREE 30-minute Design Discovery Call with us.
Mid-Century Modern Living Room on a Budget
Tips to achieve the look of a Mid-Century Modern Living Room on a budget
With a fresh yet retro vibe, Mid-Century Modern never goes out of style. Unlike other aesthetic movements, Mid-Century Modern decor is streamlined in design, as form follows function while highlighting the materials used, rather than making them something they aren’t.
Achieve the Look
Even on the tightest of budgets it is possible to achieve the retro look and feel of Mid-Century Modern design, and I’m going to show you how.
In the example below sourced from Bassett Furniture, streamlined furniture juxtaposed with natural elements highlight a mixture of natural finishes, cool black tones, different textures, and varying metallics. I totaled up the main components of this room, and to purchase everything pictured directly from Bassett, you are looking at spending upwards of $7,000. For some, this price tag is a non-issue. As for the rest of us, we would need to take some savvy shortcuts to achieve this look.
On a Budget
Luckily for you, I went ahead sourced a much more budget-friendly version of the same inspirational room. The foundational elements are still there, but come with a much smaller price tag.
First and foremost, if you are considering updating your living room in any style, I would recommend that you do place a bulk of your budget into investing into pieces like the sofa or coffee table that will get the most use. Investing in quality pieces will give you peace of mind that they will withstand day to day wear and tear. Accent furniture is easily replaced once they’ve seen better days or you just tire of the look all together.
Sofa
In my Budget-Friendly version I found the strikingly streamlined gray Lyman Sofa from Ashley Furniture for a fraction of the price of the inspirational sofa.
Accent Chairs
AllModern.com is my go to source for all things Mid-Century Modern. I found the Siddhesh Armchair with an authentic retro finish and unique open-framed arm design for $490 each.
Coffee Table
I swoon over the inspirational coffee table duo! The organic shape and visual weight the two tables add to the example living room are spot on. After tirelessly searching for a suitable dynamic duo with a more reasonable price point, I came up short. My solution though is this tapered Kaylah Coffee Table in a beautiful wood tone. I think this table would add the same visual weight and interest as the table in the example, but at a much more reasonable price. Serving as an investment piece, the alternative coffee table I found would be a splurge item in this scenario.
Side Table
I love, love, love the organic Tori Side Table that I came across on AllModern. I think I love it even more than the round table barely visible between the two accent chairs in the example photo! I would also recommend repeating a similar wood tone as the coffee table to bring natural warmth into the space.
Cow Hide
Use an area rug whenever possible to ground the seating arrangement. In the example photo the gorgeous natural cow hide area rug adds a layer of soft texture on top of the natural jute area rug. Cow hides can be very expensive though. An alternative to a natural cow hide rug is the Faux Cow Hide Rug which is soft plus easy to maintain.
Mirror Mirror on the Wall
A 48” diameter mirror would make a dramatic statement in any room! The example mirror has more of an oil rubbed bronze finish which is quite nice, however I think I would repeat the black finish found on the frame of the accent chairs. I sourced an elegant black metal framed Eternity Mirror which costs roughly $230, a steal considering the large scale of the mirror!
Pillows
Throw pillows have a way of tying a room together. You can easily add pillows that are understated or whimsical. If you purchase quality pillow inserts, you can swap out inexpensive pillow covers seasonally or however often as you like. In my budget-friendly comparison design, I opted for black pillow covers with modern white stripes from Woven Nook. I think it is important to mix things up a bit and make the design work for the end user.
I’d love to hear your thoughts on how my budget-friendly Mid-Century Modern living room design measures up to the inspirational room?!
Staging a House on a Budget - Lenko Design Featured on Redfin Blog
Originally Featured on Redfin
I was so excited when I was contacted by Redfin to be a featured home stager in their “Staging a House on a Budget - Tips From the Experts” blog! With so many great budget friendly tips to share, I had a difficult time deciding on just one low-cost staging tip to share. I finally decided to share advice for easily staging bathrooms because so often the bathrooms are ignored.
The Main Bathroom really is a key selling feature and should be treated as such. A crisp, clean and soothing bathroom will invite Buyers’ in and give off a spa-like ambiance. White fluffy towels rolled up or nicely folded in a stack near the tub remind Buyers’ of relaxing in a hot bubble bath and melting the stress of their day away.
To read the complete list of budget friendly tips from other staging experts click the link Redfin.
Staging Essentials for Quick Home Updates
Home Staging Essentials to quickly update your home.
Products Every Seller Should Buy
Modernizing is a key element in home staging and the most effective way to modernize a space is to add some key staging accessories that help to update each room. Usually after the home staging consultation I will create a home staging props shopping list for the seller. I recommend seller’s to purchase items that will go a LONG WAY in updating the home and attracting the best offer possible.
To make things easier for any seller planning to put their house on the market, I have curated a 6-page shopping list of essential home staging props.
Everyday Decor
What room can't benefit from a large jute rug, fresh new pillows, more lighting and fiddle leaf tree?
These simple, yet updated staging accessories are usually the missing piece in a living space. Make sure to go large on the floor rugs, so that every front leg of your furniture touches it.
Amazon is my go-to place for awesome pillows, so have fun exploring for that perfect, pillow combination.
Entryway Accessories
Every home can benefit from a new doormat, attractive vases, mirrors, and serving trays (find out why I love serving trays so much in my blog post all about trays).
The 37-inch circular mirror can work in any home and multiple spaces to add additional light, use over a fireplace, in an entryway or go over a bathroom vanity. At $140 from Amazon, this mirror has over 500 five star reviews!
The large jute storage baskets are another extremely versatile item that can add much-needed texture to any space for a mere $30 bucks on Amazon.
Kitchen Essentials
Most kitchens lack warmth and personality because they are filled with hard finishes. Never clear every counter and try and sell a bare kitchen! Since the kitchen is a huge selling opportunity for the home seller it becomes even more critical to carefully stage counter vignettes that add texture and warmth.
I personally love the look of cookbooks sitting upright on a kitchen counter, a bowl of fresh fruit and brand new woven dish towels or table runner. White accessories denote cleanliness, so using white home staging props will help to make the clean connection for buyers. These small, inexpensive additions go a long way in creating a clean, natural atmosphere.
Bedroom Basics
Bedrooms are so personal, that it can be discomforting walking into another person's boudoir for a buyer...especially if the bedding is old and tired looking.
Adding white bedding enlarges the space and gives it a fresh, clean feel in any bedroom.
Bathroom Essentials
Bathrooms are similar to bedrooms in that they are intensely personal, so using white and having it immaculate will never scare off buyers. Use a serving tray to anchor a vignette on the counter. Fresh white, fluffy towels stacked by the tub and greenery gives the space that spa-like feeling.
Coffee Table Vignette
Building beautiful vignettes or what I call "emotional connection points" in each room of the home takes an extreme eye for design. I built a perfect coffee table vignette that is easy for you to purchase and build on your own.
Find this along with all of the other products in our 6-page curated Shopping List.
Quick Updates Help Sell Homes
Even if you are selling your home on the tightest of budgets, these many items valued in total at around $1250 will make a $12,500 difference in the value of the home.
Buyers are looking for stylish decor and statistically will pay more for homes that have updated decor, so spending a bit on these versatile accessories will be an investment in the sale of the home. Not to mention, you can reuse them in your brand new home!
#homestaging #homedecor #essentials Source
Want even more Quick Update Ideas? Check out Best Sellers from Amazon.com.
Download a FREE copy of this curated shopping list filled with our go-to Staging Essentials that are sure to quickly update your home.
This includes 6-pages worth of shopping links!
Serving Trays - Gorgeous, Affordable Styling Ideas
Serving Trays are a must when it comes to styling a home for sale. This versatile home accessory can serve so many functions and complete the look of a room.
Serving trays are a great accessory that is versatile in so many rooms. Not only practical for serving your favorite foods on special occasions, but also serve as a decor piece to spruce up your coffee table, have breakfast in bed, or can be used in the kitchen or even in a bathroom. Here are some examples of beautiful serving trays that can be used in Home Staging or Redesign.
Serving Tray Stylizing Ideas
Below are some of my favorite ways to stylize serving trays. Whether you are creating a vision for a potential buyer by strategically placing decorative items or simply adding decor for yourself, serving trays offer so much flexibility you are bound to find some inspo for your own home!
Everyday Styling
Natural wooden serving trays add warmth to any space. Accessorize with a few stacked books, your favorite coffee mug, a gorgeous vase with fresh flowers and you are all set!
When accessorizing, remember to use the styling Rule of Threes: High, Medium, Low.
By using varying heights of decorative objects, you are adding visual interest.
Living Room Essentials
Magazines that speak to your demographic are a personalized touch that won’t go unnoticed when staging your home for sale. Taking the extra step to include natural objects such as seashells speak to where your home is located and creates a vision for potential buyer’s to envision themselves taking a trip to the beach.
Bathroom Indulgence
When preparing your home for professional photos to go on MLS, keep in mind that metallics photograph extremely well because they reflect light. In a bathroom, add spa-like items such as candles, fresh flowers, fluffy white towels, and natural wood elements. Doesn’t this example exude a luxurious and relaxing space?!
Bedroom Accessory
This example of a serving tray on a bed evokes a feeling of a cozy breakfast in bed. What a treat that would be?! Darling white coffee cups and a coffee pot pair beautifully with this rustic wood rectangular tray.
Kitchen Basics
Kitchens are the “heart of the home”. Staging a kitchen is imperative because buyers expect to see a clean, organized kitchen with special emotional connection points that draw them into visualizing themselves entertaining and cooking family meals. Create a true focal point by using a serving tray as a centerpiece. The tray will anchor the accessory grouping all together.
Seasonal Decor
Serving trays can be used all year round! Switch up your accessory groupings to coordinate with your seasonal decor.
Shop The Look
Serving Trays all less than $55
Do you have a serving tray? Do you style it or only use it for entertaining? I just bought one myself so I would love to hear your ideas!
#homestaging #homedecor
ergonomics: Tips To Optimize Your Home Office
Is your home office creating more stress and unproductivity? We have 8 tips that could help you to have a more functional workspace.
8 Tips to Set Up an Ergonomic Home Office
Is your makeshift Home Office working against you?
Does the idea of turning your current Home Office into a Pinterest worthy Pin make you nauseated?
You aren’t alone! Due to the novel Coronavirus, people across the globe are being forced to work from home for who knows how long. You may be feeling like you just need to make do with this temporary work situation so that you can do your job as effectively as possible. Well, I am here to put the F-U-N in Functional!
I put together some practical tips to help you make your Home Office more functional so that you can focus on what matters most… doing your job well!
First, allow me to explain what ergonomics is. Ergonomics is the process of designing a workspace with products and systems that fit the people that use them. The scientific findings of ergonomics aim to improve workspaces and environments to minimize the risk of injury. The ultimate goal is to create safe, comfortable, and productive workspaces.
So with that, let’s get to it!!
#1 Stand Up and Get Moving!
Sitting for hours on end without moving can take a toll on your entire body. Taking frequent breaks from sitting allows for movement improving blood circulation, comfort, and performance. Moving also decreases the risk of injury.
Sit-to-stand desks are a great option, but they have to be properly used. According to Cornell University professor Alan Hedge advises “the optimal sit to stand cycle is 20 minutes of seated work followed by 8 minutes of standing, followed by 2 minutes of moving around” courtesy of www.pcmag.com.
Take frequent breaks to stand up, do a few jumping jacks to get your blood flowing, and make sure you are postured properly when seated.
#2 The Right Chair
You don’t have to spend a fortune on a fancy orthopedic desk chair. I do, however, recommend you use an appropriate office chair. A hard wooden dining chair is bound to give you back and neck pain! Using an appropriate office desk chair with adjustable settings that can be customized to your personal needs will greatly relieve back pain as well as reduce the urge to slouch. If you need extra lumbar support for a chair that you are already using, try rolling up a towel and placing it at your lower back.
Having the right chair is critical, but you need to also consider your posture. Are your feet flat on the floor? Do you find yourself slouching? An ergonomic chair will help to posture yourself for productivity.
#3 Let There Be Light!
Sufficient lighting makes work easier. We strain our eyes staring at screens most of the day. Don't make it worse by limiting lighting in your Home Office. Use natural lighting as much as possible, but make sure to supplement where it falls short. Change out bulbs if necessary. If your Home Ofice lacks natural light, try adding a task light with different lighting options.
If you are able, position your desk to face a window. Facing the desk towards the window allows your eyes to rest (studies show that periodically while working on the computer, one should look up and into the distance), cut down on computer screen glare and have a nice view.
A well-lit office is a happy, productive one.
#4 Noise. What Noise?
Are you struggling with disruptive noises when taking phone calls? Are your family members loud in the other room while you are trying to concentrate?
You may need to consider a White Noise Machine. A white noise machine is more than recordings of ocean waves, they are a collection of sounds that have the same intensity through the audible range thus creating a uniform sound perfect for masking loud disruptions.
Pretend you are at the beach for a few minutes. There are hundreds of people surrounding you. You are able to hear that people nearby are speaking, yet you barely hear what they are saying. The sounds are muffled. A white noise machine is like this - it will gently block disruptive sounds outside of your office creating a buffer from any noisy family member or neighbor. Your outside distractions will be minimized allowing you to focus on your tasks.
#5 Stay Organized
Before you stockpile organizational bins and file cabinets, put some thought into how you actually organize. If you already scan your receipts and keeps things digitally, why buy a filing cabinet? You have the flexibility of creating your workspace the way you need it. Do it in a way that will work for you long term.
#6 Elevate Your Thinking
Even the smallest home office can be fully stocked with great decor and organizational solutions. The trick is to think up. Maximize your vertical square footage by adding floating shelves or installing wall cabinets. Fill them with useful bins alongside colorful books or meaningful artwork. Wall shelves will also make it so you have to stand up to reach what you need!
#7 Cut the Cord Clutter
One of the worst things about offices is all the tech clutter that accumulates. You probably need your computer and printer, but that doesn't mean you have to stare at cord tangles all day. Take steps to free your home of cord clutter. Mount a power strip underneath or on the back of your desk. Use cable ties and command hooks to wrangle any cords that get plugged into that power strip and feed them along the back of furniture out of sight. You'll be amazed at how removing that eyesore of cords will make your office feel clean and bright.
#8 Bring the Outdoors In
Bring in organic, comforting materials like plants, seashells, candles, and wood to promote relaxation and purification. A potted plant will add a sense of warmth and life to an indoor space.
I hope that these tips have been intuitive and are helpful to you.
Peace in place. Stay well.
Interested in updating your home office for yourself or your kids? Check out these e-Design vision boards!
Why I Believe Home Staging Works
I was skeptical of home staging at first. Making a great first impression to potential buyers is critical.
I admit I was skeptical at first about home staging. I mean, can’t everyone walk into a space and visualize the appropriate furniture?! Nope.
The truth is that only 1 out of 10 people can do this. As a designer I have been trained to do this and when my husband and I listed our home for sale I asked our agent if she felt staging helped when selling homes. She confirmed that it in fact does. I was still feeling apprehensive, but I trusted her opinion.
Our selling situation was unique in that we had a time crunch to list our house due to a quick job relocation, so I got right to work. At this time I had watched enough HGTV shows that thought I knew enough about staging and all the house needed was to be clean, decluttered, and depersonalized. Since we began the packing process early we took down EVERYTHING from the walls so we could patch holes and touch up paint (I later regretted taking down artwork and generic decor). I styled our rooms and cleared out all personalized items.
Our house was listed and went under contract within 15 days! What a relief that was with such a quick turnover. It was at that moment that I became a believer.
Feedback from the open house we held confirmed what our agent told me about staging and she thought our house was staged wonderfully. Staging and receiving multiple offers and ultimately selling our home for more than asking price is what lead me to pursue Home Staging as a career. I want to share with other homeowners what I have learned along the way and how statistically spending 1-3% of the value of your home on home staging & upgrades will typically net you a 10% return in the sale!
I’m not here to tell you that if you stage your house it will in fact sell as quickly as mine did. There are a lot of external factors involved such as housing market trends, economy, the season of the year you are trying to sell, comparable homes in your specific area, and most importantly how realistic your listing agent prices your home.
What I can give to you are statistics from the NAR Profile of Home Staging Report:
Almost half (44%) of Seller’s Agents believe the staging increased the value of the home 6-20%.
Over 83% of buyers find it “easier to visualize the property as their future home” when it’s staged.
Absolutely NO (0%) of Seller’s Agents believe that staging has a negative impact on the value of the home.
After becoming an HSR Certified Home Stager, I now know the art form behind what true home staging consists of. I look at my MLS photos and critique where I could have improved upon our rooms. Remember earlier I said I regretted removing everything from our walls? This may be my overly critical side coming out, but I do now fully understand a buyers mentality. Buyers need to see furniture and accessories strategically placed to visualize living in a home.
Ninety percent of potential buyers are viewing homes online first and making a decision based on photos alone whether or not they want to even view the home in person. There is great power in professional photography! Once they decide to walk through a home, they are making an opinionated decision within the first 15 seconds. They cannot overlook things that need repairs. Carpet stains, cracked tiles, squeaky door hinges, outdated bathroom fixtures or even dirty baseboards are all things that scream RED FLAGS. A buyer’s mental to-do list will only grow bigger and bigger. A buyer cannot look past other people’s clutter. When they see this, they immediately think “this home doesn’t have enough storage space”. Don’t leave money on the table by not doing the hard work and fully preparing your home for sale.
Often sellers think that they can “stage their own home”. True they can, however, sellers do not have the ability to be objective of their homes. Until a seller can truly disassociate and view the home as a product, they won’t be successful with staging it to sell.
Benefits of working with a Professional Home Stager:
A professional Home Stager will be able to guide a seller on how to appropriately arrange furniture and accessories to fit the buyer demographic.
A professional home stager will implement techniques to evoke an emotional connection with the home.
A buyer needs to be driven emotionally in order to feel that “this house is the one”. That emotional tie will be the icing on the cake and lead to a buyer paying above list price because they will feel that they cannot live without purchasing that specific home.
I have been proven wrong. Cleaning, decluttering, and depersonalizing a home are not enough. Sellers have to invoke a lived-in feeling that a buyer will fall in love with. Staging works. Allow Lenko Design to guide you through the process.
Our expertise, your success.
Tips To Make Your Home Sparkle
Tips to Make Your Home Sparkle for MLS photos, open houses, and home showings.
As a Home Stager, my ultimate goal is to help the Seller market their greatest asset. For a homeowner wishing to sell their home, their greatest asset is their house. I want their home to sparkle and shine so their MLS photos look amazing for their online listings and more importantly for their Open House or Home Showings.
When I put my house on the market I cleaned every square inch. It was very stressful making sure that my house was clean and in pristine condition. Especially with two young kids, our family dog, and not to mention my husband had already left for his new job in North Carolina! I had to come up with an easy way to quickly clean all surfaces and make sure my house was ready at all times for my realtor to call for a home showing.
What I did was gather all of my favorite cleaning products (you can find Amazon.com links listed at the bottom of this blog) and dumped them into an empty plastic laundry basket that I could quickly pull out, clean, and hideaway. You could also use a plastic storage container — just something that is lightweight and be easily put out of sight. This way all of your go-to products are all in one single location so you can access them in a hurry. You want your home smelling fresh and clean for every home showing, so having this basket full of cleaning products at your disposal will greatly speed up the process for when your realtor calls and wants to show your home in the next 30 minutes!!
When we let our rooms go, we are creating more stress in our lives than we can imagine. We are also letting chaos reign, which in turn affects every other part of our lives, making us feel out of control. Presenting rooms which are clean and in good repair is imperative in order to get the best price for the home. Most buyers do not want to see any sign of dust, hair, dirt or stains. Do not let a simple thing like carpet stain turn off a potential buyer. A successfully staged home will sparkle, which in turn gives buyers the impression that this product was well taken care of!
We highly recommend bringing a cleaning service into your home for heavy, deep cleaning BEFORE the home is staged. It’s hard to be objective about dust and dirt because we get used to seeing it at times. Paying the extra money for professional cleaning reaps huge rewards. Here is a preview of our Home Cleaning Checklist to consider as you walk through the living areas:
Look around the room with fresh eyes and see if you find anything that needs repairing, refinishing, touch-up or TLC. Buyers notice these things right away, and if their mental “to do list” gets too long, no offer will be coming. In terms of living in the space, researchers have found that it’s the small, repeated irritants that provide the most stress in our lives, so be sure to DO your To Do list—don’t risk a lot of extra stress!
Below you can find my recommended cleaning products. Happy cleaning, successful SELLING!
Disclosure: This website contains affiliate links.
SUBSCRIBE
Signup for our mailing list so you are always in the know!