My passion for interior design derives from helping people just like you solve design dilemmas. My hope is that I can inspire you through my own life journey and what I’ve learned along the way. Thank you for your support. -Tiffani
Fall Porch Decorating Ideas
Transform your front porch into a cozy autumn retreat with thoughtful decor ideas.
Hi friend! I love the fall season! The changing cooler weather, pumpkin everything, and pulling out my cozy sweaters. My most favorite part about fall is decorating my front porch.
It doesn’t take much to transform your porch. You could use what you already have or find inexpensive decor items to add some warm welcoming vibes to your home.
Front Porch Inspiration
Transform your front porch into a cozy autumn retreat with thoughtful decor ideas that celebrate the season.
Start with a warm welcome by adding a seasonal wreath adorned with vibrant leaves or rustic accents.
Seasonal welcome mats come in an array of shapes, sizes, and wording. I like to layer welcome mats to add dimension and texture.
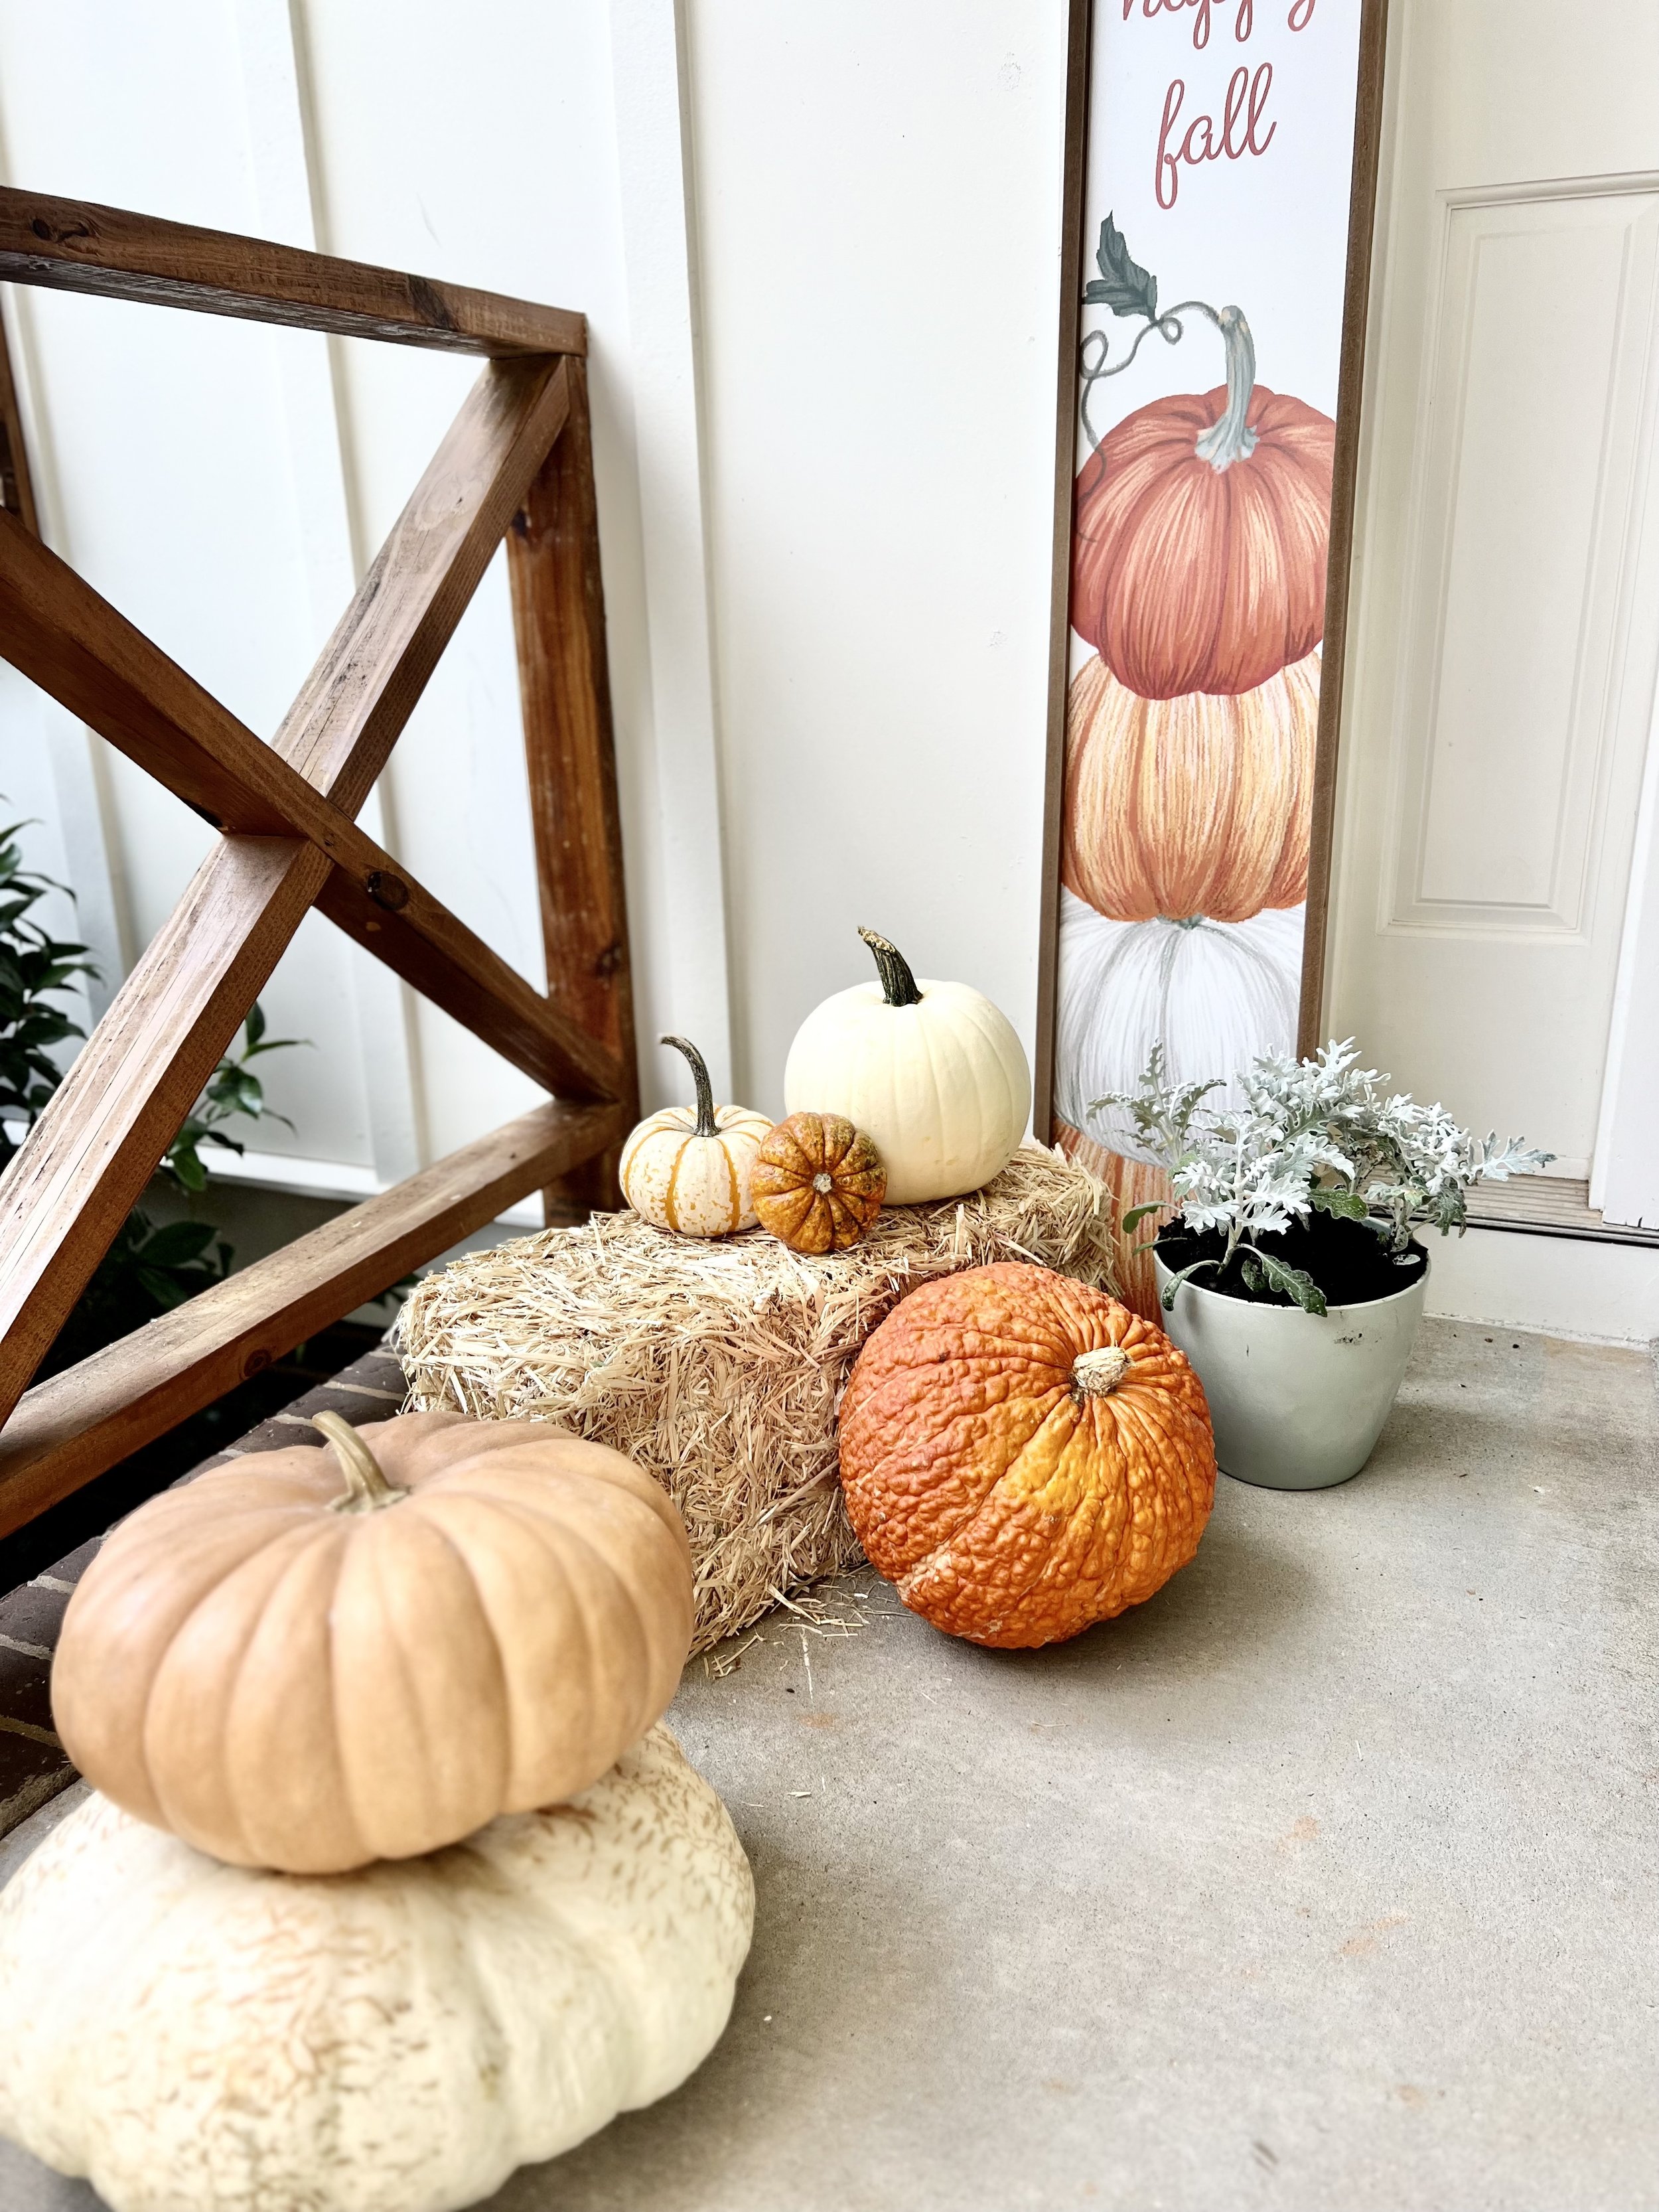
Incorporate hay bales and pumpkins in various sizes to create an inviting focal point.
Some of the most popular flowers, like mums, roses, dahlias, purple pansies and, yes, even bright yellow sunflowers, all bloom around September and October. Plant these in varying planter pots of different sizes, shapes, colors, and heights to add visual interest.
Use throw pillow cushions on rocking chairs to invite guests to sit and enjoy the crisp air.
Create symmetry by repeating the same planters on both sides of the steps or doorway.
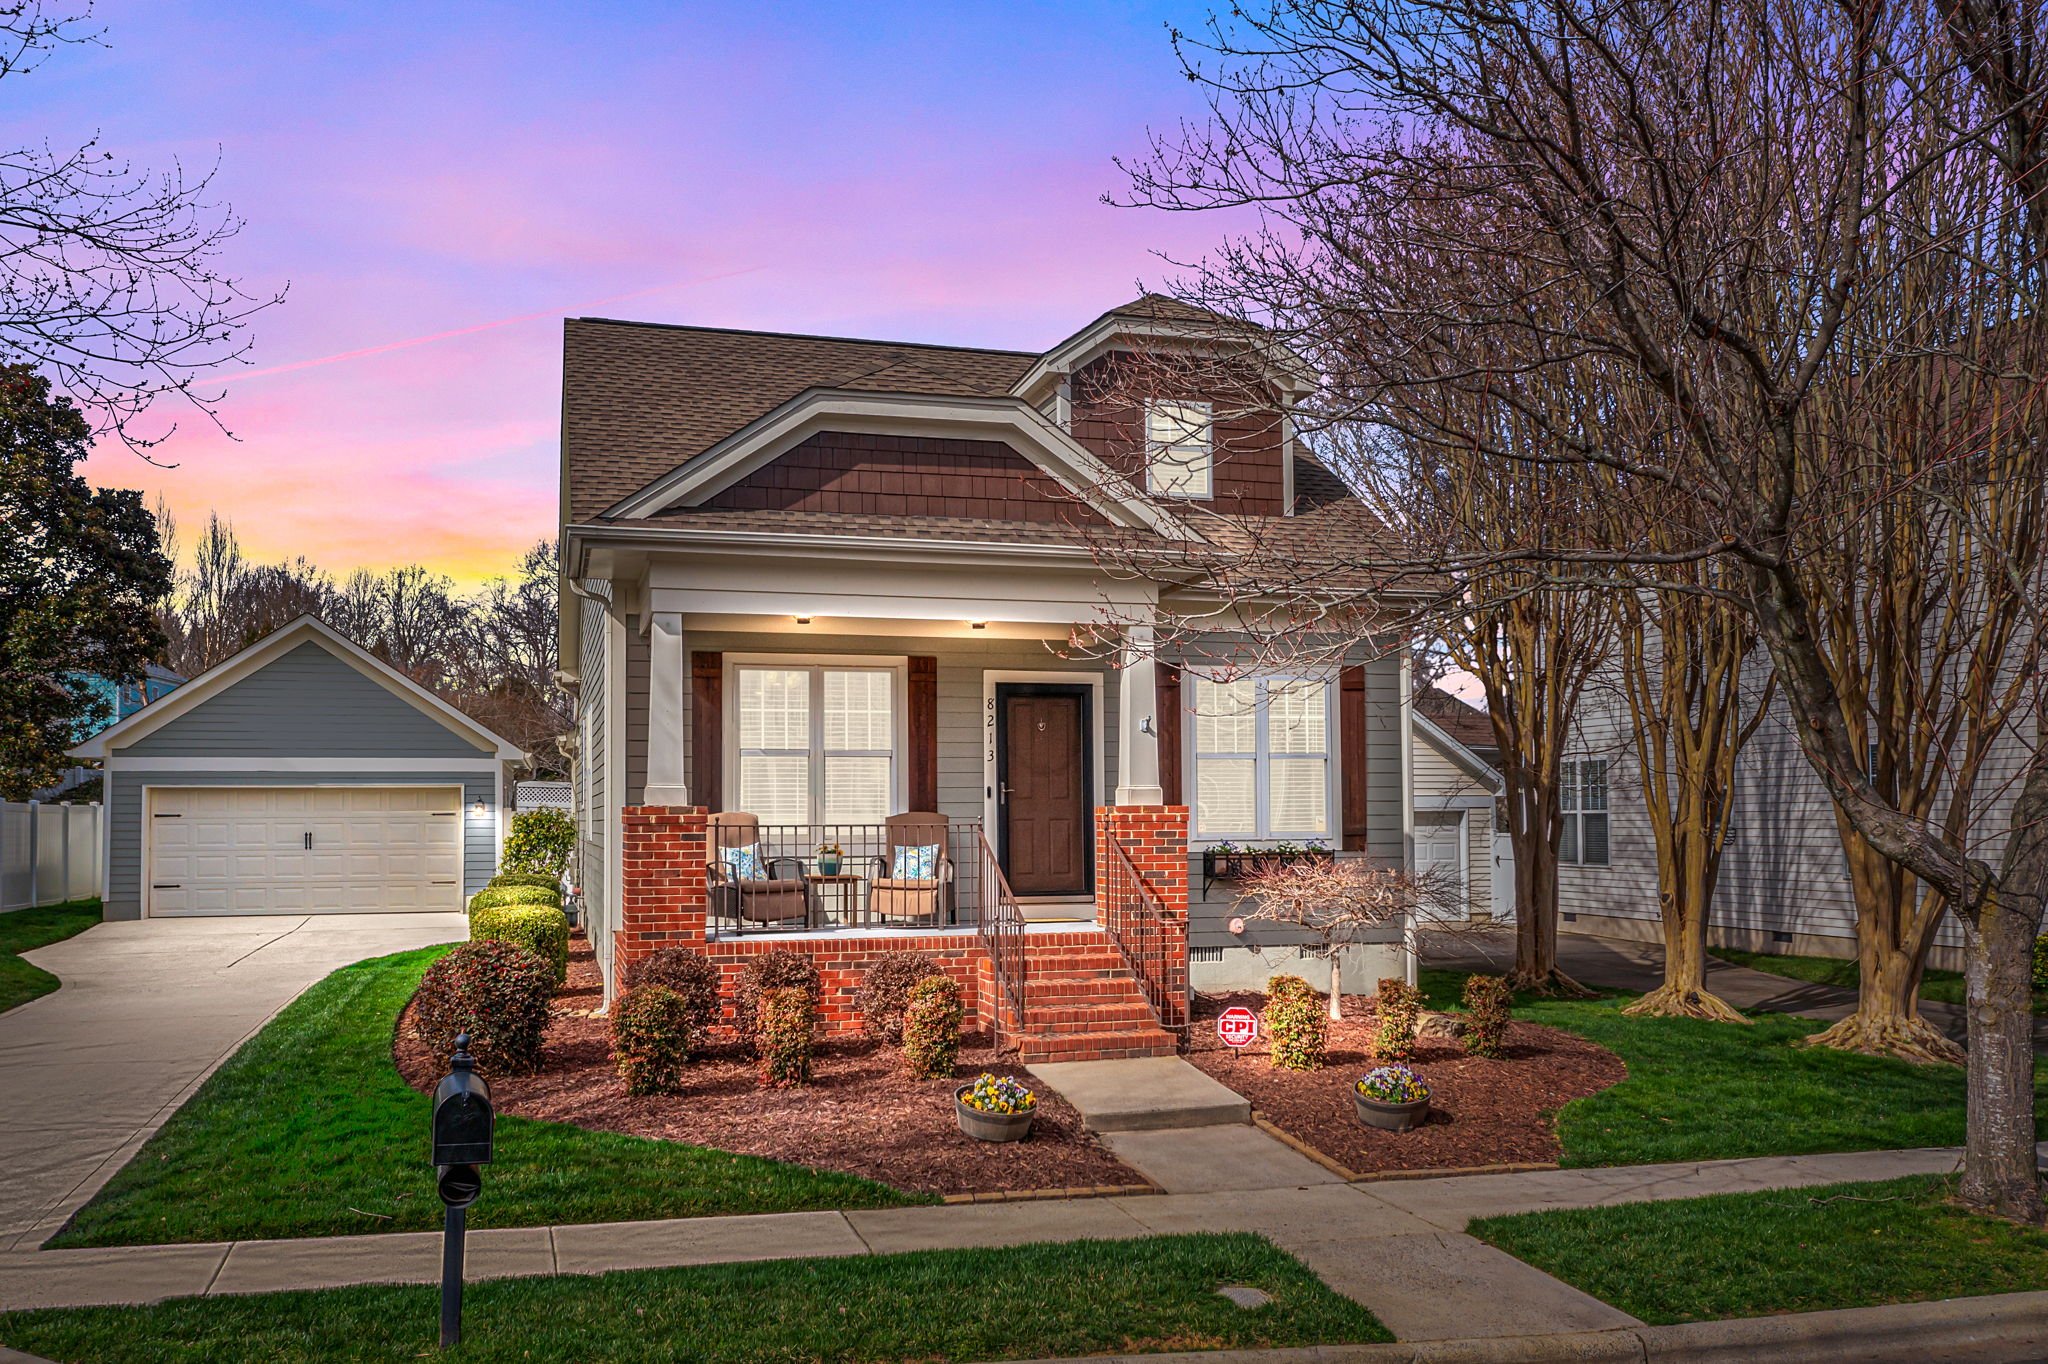
Use muted colors that relate to the home's exterior colors and don’t be afraid to mix in green with shades of orange.
I wholeheartedly believe that there's no such thing as too many pumpkins!
With these delightful fall front porch decor ideas, you can craft a lovely space that truly captures the essence of the season!
If you are local the the Charlotte, North Carolina area, I would LOVE to help you transform your front porch! Let’s connect!!
Did you know that eDesign can keep you from making costly design mistakes?
Fashion-Inspired Dining Room
Fashion advertisement transformed into a room design.
In the realm of Interior Design, inspiration can spring from various sources. Recently, I stumbled upon a fashion magazine ad and had the idea to transform the campaign into a room concept for a creative twist.
The Inspiration
The sand, sky, and sea at the beach are the foundation for a style movement that we never tire of - the classic, quintessentially coastal look. It always stays in style because, when done well, it conjures up a luxurious, laid-back lifestyle.
The Louis Vuitton Cruise 2024 Campaign, is an evocative fashion campaign starring English actress Emma Laird set on the captivating Italian island of Isola Bella.
The narrative blends history, elegance, and allure, with models representing the collection's essence.
Jamie Hakesworth's visuals depict the island's rich history and folklore, evoking a timeless and fantastical atmosphere.
The Mood Board
Drawing inspiration from the location and model’s ensemble in the advertisement, I concentrated on infusing soft tones and textures into this mood board to reflect the essence of the captivating image.
Visual mood boards are instrumental in sparking ideas and integrating textures from inspiring images. Through carefully selecting and organizing a collection of pictures, I establish the groundwork for designing a room.
The Sketch
Sketching a room puts my ideas to paper.
The Rendering
After I’ve brainstormed and have a better understanding of the overall feeling of a room’s aesthetic, I put it all together into a 3D rendering.
Advertisement Reimagined
Both the advertisement and room design encapsulates a vibrancy, crafting a timeless and enchanting atmosphere.
I can't wait to hear your thoughts on my creative process of turning a fashion design advertisement into a room design.
Did you know that eDesign can keep you from making costly design mistakes?
Hallway Refresh
Hallway gets a refresh with board and batten and new wallpaper.
This dark dead-end hallway was boring and needed a refresh. Check out what we did to make this a more appealing and happier space!
The Before
Where to start with this dead-end hallway? The overall darkness, the chair rail, the awkward yet narrow walkway, or the lack of a linen closet…
I’ve always been bothered by the floor plan layout of this hallway. The angled wall to the right creates a very narrow walkway from the landing of the stairs. Since we aren’t changing the walls or layout of this space, I had to decide on what could be changed.
What We Did
We opted to remove the unnecessary chair rail. Chair rail has a place in dining rooms to protect walls from chairs being pushed up against the wall. Why the chair rail was installed upstairs in this hallway will always be a mystery to me!
We repaired the walls from the chair rail removal and installed board and batten.
I found this gorgeous Dark Multi Moody June Blooms peel-and-stick wallpaper from WallPops. I loved the blue accent color paired with the different shades of green and tiny bits of orange.
This was my first time installing peel-and-stick wallpaper and it was fairly easy. I did find it a bit challenging to line up the patterns perfectly. I love it though and the print adds so much life and cheerfulness to this dead-end wall.
After applying primer to the wood, we painted a fresh coat of Sherwin Williams Agreeable Gray SW7029 paint on the walls. I opted to paint the board and batten the same as the original paint color as a way to color drench the space. The original white chair rail and trim stood out, and not in a good way!
It took me several days of sanding and fully preparing the walls to be primed and painted.
Once all the painting was complete, we moved our antique pie safe back into place. The blue cabinet which we use for linen storage, was the inspiration behind my selection of wallpaper, area rug runner, and table lamp.
HOT TIP: Find an inspirational piece to begin developing your design plan. This can be artwork, a pillow, an area rug, a pretty pattern on a dish… you can draw inspiration from almost anything! Your design plan will have a purpose once you do. You’ll know what colors or patterns you are drawn to and a clear direction of what you would like to try and incorporate into the space.
To help add some light to this hallway, I found this adorable blue glass table lamp on Amazon and the white wall mirror was on clearance at Hobby Lobby. The mirror helps to reflect light and also makes the hallway feel a bit longer than it really is.
The dark wood cabinet in front of the wallpapered wall has a lot of scratches on it. I’m considering stripping the dark stain and giving this old cabinet a facelift.
What do you think?
Paint the cabinet a light green or go with a more natural-looking wood tone. I’d love to hear your thoughts!
Painted Cabinets
How to paint kitchen or bathroom cabinets.
The overall aesthetic of my kitchen was mismatched and outdated. Since the cabinets and granite countertops are in great condition, we decided to paint the cabinets.
This is how I did it.
What You’ll Need
I used everything listed below plus some additional brushes I had and buckets to clean with.
Preparation
Step One:
I removed all of the doors and drawers from the kitchen. I took off the knobs, hinges, and clear sticker bumpers.
Step Two:
Once the hinges were removed, I used a Sharpie marker to write what number the cabinet was inside one hinge hole cutout. I then also labeled a piece of blue painter’s tape with the same number and stuck it on top of the number marked with Sharpie. I did this because when the paint was sprayed on, it covered up most of the labels on the painter’s tape. I was able to pull it off and see the numbers clearly for the installation.
I also made labels out of blue painter’s tape for each drawer.
Step Three:
I sanded the cabinet boxes, doors, and drawer fronts using 320-grit sandpaper wrapped on a sanding block.
I wiped everything down with a tack cloth and then using a paint rag, wiped with Liquid Sandpaper.
I then mixed the TSP All-Purpose Cleaner with warm water and wiped everything making sure to get any leftover sanding residue.
Be sure to wear heavy-duty protective gloves during this process!
Hot Tip: Use a hair dryer to heat any sticky residue and scrape it off with a palette knife or flathead screwdriver.
Step Four:
Prep your workspace. Place painter’s plastic down on the floors and on top of countertops to protect from paint spills or drops.
Using the Green Frog Tape, tape all areas where the cabinets meet the walls, floors, appliances, countertops… everywhere you don’t want paint. Be sure to tape two layers side by side. Doing so will make it so that the edge of your paint roller goes on the tape and not the wall.
I taped painter’s plastic on the interior of my cabinet boxes to protect them from unwanted paint splatter.
Applying Primer
Step Five:
Cabinet Boxes
I painted two coats of Zinser BIN Primer on the cabinet boxes. The primer is very thin and smells awful. Make sure you ventilate your room as much as possible.
For the cabinet boxes, I cut in using the 2” flat brush and rolled on the paint everywhere else.
Door and Drawer Fronts
When I primed the doors and drawer fronts, I used the paint sprayer. It was much faster and only required one coat of Primer. The downside was that the paint sprayer used up a lot of Primer. I ended up going through an entire gallon.
I first painted the backs of the doors and drawers. If I made any mistakes or the paint dripped, it was on the back and less noticeable than on the front.
HOT TIP: Wear a properly fitted face mask, eye covering, and gloves when using primer.
I used the mini cone paint stands to prop the doors and drawers up on as they dried.
Once the backs were dry, I painted the fronts and sides and then let them dry.
HOT TIP: I learned that once dry, the Primer dries flaky on the painter’s plastic and painter’s tape. I had to use a lot of tack cloth to get the flakes off before I could paint with the cabinet paint. I probably should have removed the painter’s plastic and then prepped it again with fresh plastic and tape.
Applying the Cabinet Paint
I chose the Nuvo Cabinet Paint because it is easy to work with plus the kit comes with everything you need to get started. Nuvo has several colors to pick from and I really liked that they included very detailed instructions.
I used the Nuvo Cabinet Paint on my bathroom vanities without the top coat that can be purchased separately and the paint has held up very well. I do plan to go back and put a top coat on them just to make sure the paint lasts even longer.
Step Six:
Cabinet Boxes
Using the same method as with the Pimer, I cut in with a 2” brush and rolled the paint on with the cabinet paint roller. I found the Nuvo Titanium White paint to be very thick but applied smoothly.
I didn’t take a picture of this step, but I used the drywall knife to avoid paint bleeding through the painter’s tape onto the flooring. I put the flat edge of the drywall knife on the floor up against the shoe molding and painted on top of the knife instead of painting directly onto the painter’s tape.
It took two coats of cabinet paint to fully cover the Primer. I repeated the painting process with one layer of the Clear Top Coat.
Drawers and Doors
I used one of my daughter’s toy bins that has wheels on the bottom to easily rotate the doors and drawers around while I painted them.
I started with the backs again. I first cut in with a brush and then rolled on the paint with the paint roller.
After the backs were dry, I repeated the process for the fronts.
I let all of the doors and drawers dry overnight and then repeated the process of applying the Clear Top Coat.
HOT TIP: Remove the painter’s tape while the paint is still a little bit wet. This will allow for cleaner edges.
Putting It All Together
Step Seven:
Inspect your paint job to see if there is anywhere you need to touchup, then replace the clear bumper stickers on the backs of the doors and drawers.
Step Eight:
I enlisted the help of my husband to help reinstall the doors and drawers. We replaced the hinges with new soft-close hinges and hung the doors back up.
After the drawers were put back, we installed new knobs and then we admired all of the hard work that went into this transformation!
I am so glad we decided to paint our cabinets! It was a labor of love and definitely took me longer than I anticipated. I think the most time-consuming part of this project was the prep work, but it was necessary to achieve the results I wanted. All in all, this project took me over two weeks to complete. I worked a little bit every day and did what I could while my kids were at school.
Now we have a fresh bright white kitchen that instantly brightened up the entire space!
FREE download! Start planning your next home refresh with this Room Budget Calculator.
Out With The Old… In With The Newly Refreshed Kitchen
An outdated kitchen gets a fresh coat of paint.
When we purchased our house in 2020 we knew that the Kitchen would need a facelift. The layout is perfectly functional, but the overall aesthetic was mismatched and outdated.
The Before
The layout of the Kitchen works for us, but the reddish brown cabinet stain and pink beige tile felt outdated and clashed with the black and white granite countertops.
The hanging pot holder served no purpose and was crooked and off-center. When we removed it, we found out the hanging pot holder wasn’t even secured to a ceiling joist! Thankfully we never hung any pots from it.
The Flooring
The flooring had to go! The pink beige builder-grade tile was chipped, cracked, and clashed with the black and white granite countertops.
With kids and pets, we ultimately decided to install a wood-look LVP (luxury vinyl plank tile) throughout our first floor due to its durability and water resistance.
When installing this type of wood look flooring, it is important to try and run it continuously throughout. Never try to install the flooring up to another type of wood pattern. It will not ever look right because the wood tones will be different and you could timestamp your house.
BEFORE
Do you see how awful the installation was? The previous owners of our house installed LVP next to the old tile. The tile is much thicker than the LVP so we constantly stepped on the “ledge”. Plus, they didn’t bother removing the tile that created a pointed angle that butted up to the column. It drove me nuts that the point was not centered on the column!
AFTER
The Walls and Cabinet Paint
We painted the walls and ceiling with a fresh coat of paint. The walls are Sherwin Williams Agreeable Gray SW7029 in a satin finish.
The reddish brown cabinet stain represented the Tuscan trend from when the house was built in 2008. The cabinets themselves were in great condition so we opted to paint the cabinets a fresh bright white. We also replaced the cabinet door hinges with soft-close hinges as well as replaced the knobs.
Want to find out how I painted my cabinets? See more here.
The appliances were replaced with a matching set and we swapped out the sink faucet for a taller spot resistant brushed stainless steel sink faucet from Moen.
The Result
The Kitchen now feels brighter and makes the entire space feel even more spacious!
What do you think about this Kitchen Refresh?
FREE download! Start planning your next home refresh with this Room Budget Calculator.
Fresh Take Log Cabin
Lakefront Airbnb gets furniture makeover.
From Cheeky Tropical Beach Decor to Updated Lakefront Comfort
A fresh take on a log cabin Airbnb.
This 1980s log cabin is nestled in next to Lake Norman in North Carolina. The peaceful surrounding environment invites guests to vacation here and to enjoy all that the lake has to offer.
Redesigning the furnishings for this Airbnb was a huge undertaking because the cabin has so many different wood tones to work around. The other main challenges for this redesign were staying true to the architectural style of the home and working with some of the existing furniture pieces. My client and I wanted to elevate the decor yet keep in mind that everything needed to be affordable, comfortable, and practical for short-term renters.
Renewed Details
Upon their arrival, guests are welcomed to their vacation home with a whimsical wooden arrow sign pointing vacationers toward the lake. Fresh new pillows and a new doormat greet them before entering.
The Biggest Transformation
I personally feel that the living room has undergone the biggest transformation. We took The Golden Girls vibe out of this house and inserted a polished yet relaxed atmosphere.
Living Room Before
Side note: I had a very difficult time trying to donate this furniture because I was told: “it was too ugly”! LOL
Living Room After
For the size and shape of the living room, I chose a more proportionately sized sectional that now allows for a better functioning conversational space. Before, the sofa and four chairs were uninviting and made the room feel closed off.
I included a new natural sisal rug layered with an outdoor area rug on top. In a short-term rental scenario, outdoor rugs are more practical in heavy traffic areas. They are easy to maintain and will stay looking nice after many guests have come and gone. It was an added bonus that I could reuse the blue rug found in another room.
New accessories, artwork and throw pillows tie together the blue and white color palette that can now be seen throughout the home.
Depending on the time of day, the two-story open living room can be very dark, so adding a table lamp was a necessity. Not only does the lamp add additional lighting, but the overall style of the lamp and the color white also make it stand out and add much-needed contrast to the wooden walls.
I added faux plants wherever I could to bring nature inside and liven up the interior. Before, the only plants to be found were the pink and green floral prints on the chair fabric, tropical leaves on the rugs, and the floral prints on the wall decor. Live plants would be ideal, however not practical in a short-term rental space.
Don’t Fight It… Work With It
This kitchen has four different wood tones going on! The walls and floors are two different wood tones and then the island is a different wood tone than the wall cabinets! Ay, ay, ay… It wasn’t in the budget to make any cosmetic changes, so I had to figure out a way to work with what was there.
Kitchen Before
Hot Tip:
The log walls in this cabin all have an orange undertone making the walls the bossy main fixed element. By establishing what the bossy fixed elements is, I then determined blue to be the best color to work with this orange tone instead of fighting against it. Orange and Blue are directly opposite each other on the color wheel creating a complementary color scheme. When you choose complementary colors on the wheel, the warm and cool hues play off each other, producing palettes that enjoy the best of both worlds.
Kitchen After
If you notice we kept the blue and white knobs on the kitchen cabinets and drawers. Since this color palette was established, I ran with it and sprinkled blue and white throughout the house to create cohesion. We could have changed the cabinet hardware for something more modern and sleek, but the knobs are a little quirky just like this house!
We did, however, swap outdated light fixtures for these beauties! The elegant glass shape adds a sense of sophistication to the room. I restyled the open shelves and we purchased new industrial-style counter stools to tie in the matte black metal from the light fixtures.
Black and Bold
Before, the dining room was very uninspiring with the outdated dining set. The dining table and chairs were the same wood tone as the walls, which looks washed out and very dated. The dining table almost disappears into the sea of brown.
Dining Room Before
Now making a bold statement, this chic black table paired with matte black metal chairs is more pronounced.
Dining Room After
I love the metal stud detailing on the edges of the tabletop and the table base is so amazing!
That View Tho!
The view from this Sitting Room is breathtaking!
Before this space was underwhelming and honestly, I can’t get past the tropical print on this furniture to even appreciate the view of the lake!
Sitting Room Before
Sitting Room After
The oversized map of lake Norman was unique so we kept it where it was.
Blue accent chairs paired with a leather loveseat offer needed texture and color to this space. A faux fur throw blanket, bright white pillows, a colorful area rug, new sculptural wall art, and small decorative items take this space up to the next level.
Bedroom Styling
This cabin accommodates up to 15 guests. Ensuring guests have everything they need for a comfortable stay is a must when it comes to short-term rentals.
In an effort to save money, we kept and reused much of the furniture that was in the bedrooms. We did, however, update most of the beds with new mattresses and bed linens.
Primary Bedroom
Originally this bedroom had a California King-Size bed. The room is large enough to accommodate this bed size, but I wanted to better use the space and create a more comfortable seating area, so we changed the bed to a King-Size.
Primary Bedroom Before
Primary Bedroom After
I was able to move two bookcases from the basement up to this room to use as nightstands. I found these sleek leather X-base benches for the foot of the bed which tie in the new black metal headboard.
I built my color palette around the existing rocking chair fabric which was in great condition. I purchased a new area rug, throw pillows, blankets, artwork, and accessories. The lamps came from another bedroom and I think they work great in this space.
Secondary Bedrooms
There are three guest rooms on the second floor and one more located in the basement.
In this first bedroom, I updated the bedding and used large Euro-size pillows to make up for the lack of a headboard. I incorporated nautical elements through the rope detailing on the lamps, oval mirror, clock, and coral throw pillow.
Bright white bedding freshens and brightens up the otherwise dark room.
The smallest out of all the bedrooms is also the darkest. I selected soft light blue bedding that has a slight sheen to it to help reflect light. Details like the embroidered “Welcome” pillows and plush area rug soften the space and create a more inviting atmosphere. Light-colored artwork also helps to break up all of the dark wood on the walls.
Bunkbed Rooms
We decided to keep all of the bunkbed frames. They were in great shape and only needed a little updating.
I liked the colorful nautical decor that was already in this room. I thought it was playful and perfect for younger kids. I added bright yellow clamp on reading lights and fleece blankets to each bed.
This white coffee table was originally in the living room serving only as a place for the internet and cable electronic boxes to sit. By moving the table to this bunkbed room and adding adorable poufs, young guests now have a play table area.
Creating a more sophisticated yet cool hangout space was a must. Updating the bedding in the basement bunkbed room allowed me to design a space better suited for teens.
I liked the leather settee that was there. To update the look though, I added textural faux fur throw pillows, a rug with a trendy boho pattern, and an interesting coffee table. Each bed now has updated more mature bed linens, a soft fleece blanket, and a reading light.
Game On!
The garage space already had so many games and activities in it, but it felt cluttered and incomplete.
Game Room Before
We added two arcade games and for an added pop of color on the walls, I chose four adventure-themed movie posters from the 1980 era to speak to the time when this house was built.
Game Room After
The garage space is ready for guests to spend some quality time together!
All the Amenities
Enjoying the lake is only one of the great outdoor activities to do in Lake Norman.
I liked how this house has a fire-pit, built-it horseshoe game, basketball hoop, and of course the dock with a paddle boat.
Jump in and make a splash!
This Airbnb has it all.
Plan Before You Plunge
To show my client design concepts, I used my eDesign platform to create renderings so they could see my vision.
Every design should have a vision or mood board. It isn’t possible to fully put together a cohesive look without planning ahead and seeing everything put together.
Interested in staying in this cabin for your next vacation?
Planning for your own Short-Term Rental?
Download a FREE copy of our Short-Term Rental Checklist for all of the necessary guest accommodations.
Pantry Refresh
An organized pantry equals easy access to food and cookware plus an immense feeling of order.
Pantry Goes From Dysfunctional to Completely Organized
Holy pantry space! This oversized pantry recently got a facelift and I’m here to share with you how we did it.
The Before
When my husband I bought our house we were shocked at the size of our new pantry. We’ve only ever had a small closet space to use. This pantry could easily fit bunk beds LOL!
The drab basic builder-grade white wire shelving was over twelve years old, dirty, stained, and not functional for adequate food storage. The vertical posts made it challenging to organize food and the open shelving caused things to fall through the cracks all the time.
What We Did
First, the wire shelving was torn out and the many, many holes left in the walls were patched.
We painted a fresh coat of Sherwin Williams Agreeable Gray SW7029 paint to the walls and I worked on the staining and adding a coat of Polyurethane to the wood shelves my husband cut and sanded. I used the Dark Walnut #2176 stain finish by Minwax.
The shelves vary in length according to the wall-length but are all right at 11” deep.
One by one we spaced out the brackets determining how much height we wanted between shelf levels and the shelving space came to life. We maximized every square inch in this space!
Once all the shelves were up, the room overall felt more open and spacious, but the dark wood tone absorbed much of the light so we decided to also update the semi-flush mount light.
Voila, instantly more light!
The fun part began with a shopping trip to IKEA where I was able to source most of the storage bins. I found the clear bins on Amazon. You can download a free copy of all the products I used here.
I organized all the food and made my own vinyl labels with my Silhouette cutting machine.
You could certainly download free printable labels and print them on sticker paper or use a marker and handwrite them!
All Done
Everything now has a place and I couldn’t be happier channeling my inner KonMari!
What do you think about this Pantry Refresh?
FREE download! Shop my favorite organizational products used to accomplish this Pantry Refresh.
Farmhouse Bedroom Designed Four Ways
We’re seeing Farmhouse design everywhere! Is this style here to stay? We designed a bedroom with four different variations of farmhouse style.
Farmhouse Style. Is it here to stay?
I recently went shopping at The Depot at Gibson Mill which is an Antique Mall located here in Concord, North Carolina. It is a fabulous place to visit with oodles of vintage and antique booths. One of my happy places! 😊 I am a sucker for unique vintage finds!
During this trip, I was inspired by the aged furniture, all the patina you could ever imagine, and mostly the surplus of farmhouse decor.
As we perused the aisles, I was so inspired that I found myself placing pieces of furniture together in my mind and imagined a farmhouse-style bedroom situated in a cozy old home somewhere deep in the country.
That leads me to question if the Farmhouse Design Style is here to stay?
After I got home I dug deeper into this thought and realized that the term ‘farmhouse’ is loosely used to describe a design trend that is so much larger than its name.
“Defined as an interior design style, farmhouse is a style that draws inspiration from the look of an actual farmhouse and uses decorative elements that you’d find in rural or agricultural areas. Farmhouse interiors are warm, cozy, relaxing and full of charm and character.” -Modsy
The style takes me back to “simpler” times. It is easy though to veer the look into too much “country kitsch”, so it’s important to maintain a stylish balance of old and new, focusing more on a natural look. In other words, farmhouse design isn’t code for going overboard with the mason jars, shiplap, cotton stems, and collections of rooster statues!
I further discovered that there are many variations of farmhouse design and how each has its own distinct characteristics.
The farmhouse interior design style can be seen all over HGTV shows, Pinterest, Houzz, and Instagram feeds. The most popular forms of farmhouse style are Classic Farmhouse, Rustic Farmhouse, Modern Farmhouse, and Victorian Farmhouse.
After reading more about each individual style, I categorized my antique mall findings as Classic Farmhouse.
I developed a bedroom mood board based on my shopping adventure.
Classic Farmhouse
A more traditional style with “French provincial” aesthetic influences, Classic Farmhouse is a softer, more feminine approach to farmhouse style and creates that classic cottage chic vibe.
After creating this concept board, I decided I needed to challenge myself to create more versions of the bedroom in each of the most popular farmhouse styles.
Rustic Farmhouse
This style is a less mid-century and more rustic/industrial take on farmhouse design. It has a heavy focus on rugged materials—like rough-hewn and natural woods, wrought iron, and leather with a rich patina—along with more vintage and antique pieces.
Modern Farmhouse
Modern Farmhouse effortlessly blends the best parts of some of the most popular trends from the past several years—you’ve got a smidge of Rustic, a dusting of Industrial, and just the right amount of Mid-Century Modern design. It instantly adds a casual-but-pulled-together character to any interior. While this style is a bit more dramatic than your typical rustic or classic farmhouse look, it still manages to be effortlessly livable. It embodies that perfect mix of modern and relaxed, for a look that’s both on-trend and approachable.
Victorian Farmhouse
Victorian Farmhouse style is warm, cozy, and a relaxing style that’s full of charm and character, but also mixes in the elements and principles foundational to Victorian style. Victorian Farmhouse maintains a definite farmhouse aesthetic. It takes all of the comfortable, cozy, and approachable parts of farmhouse design, then pulls in some of those antique and classic vibes, with a bit of a collector approach. It’s an elevated country style, with a bit of French country decorating mixed in.
When it comes to decor trends, Farmhouse style has it all—think texture, contrast, and coziness all rolled into one perfect space. This trend is here to stay and is already becoming a classic design style.
What’s your favorite variation of farmhouse design?
FREE download! Start your design project the right way with the Principles of Design.
Want to see your space before you commit to a new design?
Try eDesign.
Work directly with me on your design project. Let’s set a plan in motion so you avoid costly design mistakes. Click here to learn more about my eDesign services.
Your vision before you buy.
SUBSCRIBE
Signup for our mailing list so you are always in the know!